Showing posts with label nails. Show all posts

Thursday, November 8, 2018

Shifting Shades

 Magnetic polish is so fun, but so hard to capture on camera. These photos didn't catch the shifting cat's eye effect, but they at least got the color shift of the multichrome! I added multichrome flakies as well for some extra fun, and then a little bit of decoration using gel paint and some dipping powder.

Supplies Used:
China Glaze Liquid Leather
F.U.N. Lacquer Believe 
Magnet
ILNP Looking Glass
Wildflowers Pop-up Gel
Mia Secret Missing You (blue powder)
ASP Electric Purple (Purple powder)

Friday, October 12, 2018

Fall Trees

Prompt: Fall Trees

I wasn't sure if this would turn out well, but I think it works! I'm a bit sad that it was overcast and I didn't get to capture the subtle holo of the polish too.

Supplies:
Rogue Lacquer Petrified Forest
Born Pretty Galactic Center
Seche Astute
Twinkled T So Extra
BPL-026: Maple Leaf
Ejiubas + Sarah R2: Small Leaves (row 4, column 2 and 4)
Ejiubas + Sarah R2 reverse side: Small ovals (row 4, column 4)
Beauty Big Bang XL-022: Small Tree
Beauty Big Bang XL-011: Tree


Friday, October 5, 2018

Pond


Pond Manis seem to be the new jelly sandwich from back in the day! This was a bit rushed, but the idea is still there. I had to make a custom jelly - OPI I Can Teal You Like Me from the Sheer Tints line was too light, and OPI Turquoise Aesthetic was too dark. But mixed together, they're perfect!

Supplies:
Zoya Ness (base)
Sephora by OPI Dark Room (stamp)
Dixie Plates DP 10: Lilies 
OPI I Can Teal You Like Me
OPI Turquoise Aesthetic
Acrylic Paint
GDCOCO 3D Carving Gel White

Wednesday, September 26, 2018

Birdies

 Prompt: Birds/Feathers

Layered quite a few stamps to make these nails! I also had the slightly tricky task of reversing the bird image by stamping to a second stamper - took a few times to get it to transfer properly.


Supplies:
Sinful Colors Navy I Do
Born Pretty Galactic Center
Moyra Stamping Foil Gel Black
Gold Foil
Twinkled T Stamping Polish White
EJB-X01: Birds
Ejiubas + Sarah R2: Leaves
 

Tuesday, September 25, 2018

Bright Sunset

 Prompt: Hand Painted Sunset

I do love painting sunsets so much! I decided to go for super saturated colors this time, to make it even more dramatic. I really like how this turned out!


Supplies:
Zoya Dory
Sinful Colors Skylark
Sally Hansen Atomic Tangerine
Sephora by OPI Who's Spinning Tonight
Black Acrylic Paint
OPI Alpine Snow
Zoya Maura

Monday, September 24, 2018

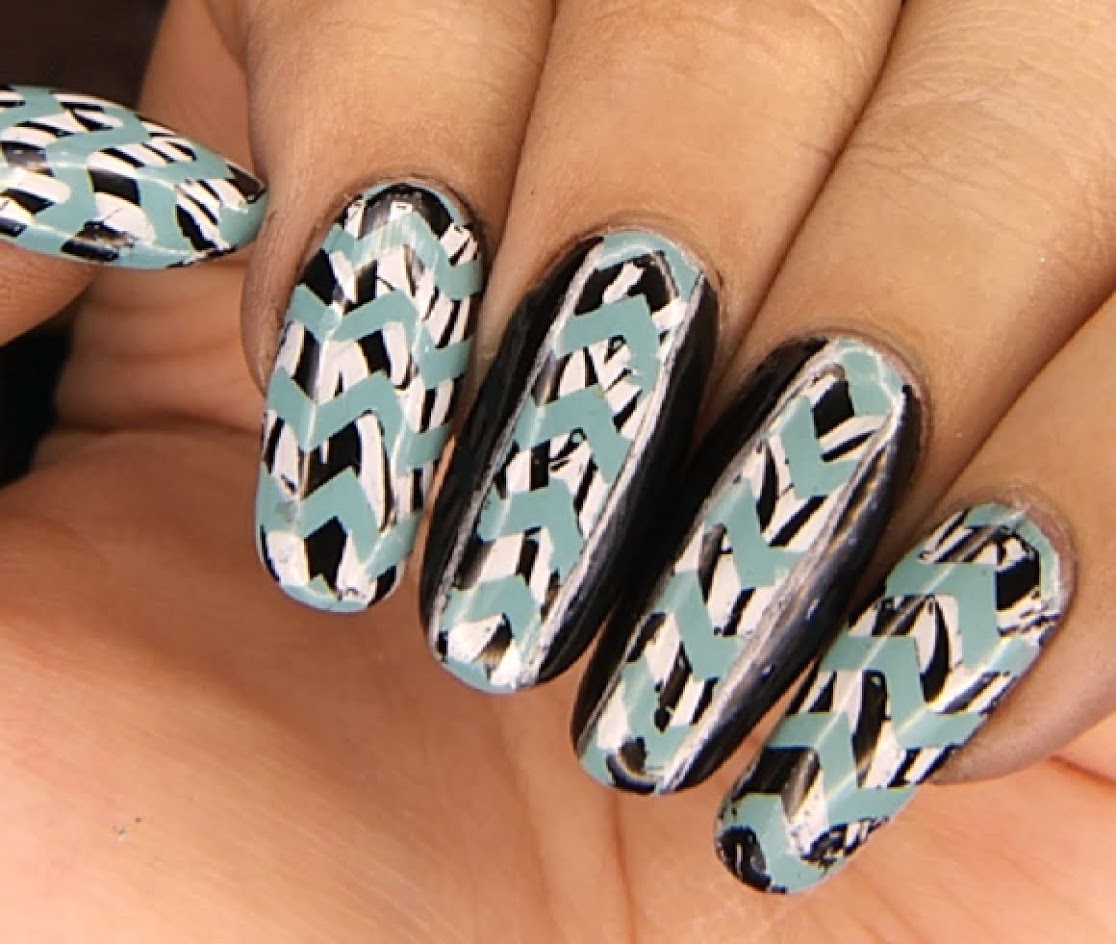
Double Processed Chevrons


Prompt: Double Processed Stamping

I really want to give this technique another go, now that I understand how it works. 

Supplies:
ORLY Gumdrop
Twinkled T Stamping Polish White
Twinkled T Stamping Polish Black
Stamping Plate BP-L 006: Zebra Stripes and Chevrons

Sunday, September 23, 2018

Fluid Nails


I'm in love with fluid nail art! I managed to get my hands on Dance Legend Spot It polishes, and this was my first experiment with them.

Supplies:
Dance Legend Spot It Blue
Dance Legend Spot It Black
Zoya Dory
OPI My Signature is DC
OPI Alpine Snow

Scribble Hearts

Stamping Prompt: Hearts

Tried out some double stamping/shadow stamping as well as a little pigment stamping.

Supplies:
 ORLY Mirror Mirror
China Glaze White on White
Twinkled T Stamping Polish Black
Twinkled T Stamping Polish Pink
Ejiubas + Don Deeva Plate: Hearts
Bundle Monster Shape Nouveau: Hearts, Hashing

Leopard Spots


Handpainted leopard spots and a leopard face. I rather love how this turned out!

Supplies:
OPI Alpine Snow
China Glaze Gold Fusion
Black Acrylic Paint
Black striping tape
Foil gel and gold foil
Gold studs

3D Leaves


 I'm back and posting images again! I'm not going to write as much, but I miss having a chronological record of nail art somewhere besides my phone gallery. So here we go, short and sweet.


Base Color: OPI Pepe's Purple Passion
3D Leaves: Custom mixed color from GDCOCO sculpting gel  
Gold Detailing: Elite99 gold gel

Friday, April 17, 2015

Day 17: Glitter

 Glitter out the wazoo! I decided to go with stamping over full coverage glitter, and it was so sparkly I had the hardest time trying to photograph it!
 I started with a silver multisize glitter polish, Sephora by OPI Are you Glistinin'? I then decided to add a blue hue with a tinting polish, Sally Hansen Ice Tint.
On top of that, I stamped a design from Pueen plate 49 using B.M.C. Royal Blue. On the vertices I placed multicolored hex glitter for extra bling effect. So much glitter!
Colors Used:
Sephora by OPI Are you Glistinin'?
Sally Hansen Ice Tint
B.M.C. Royal Blue
Pueen 49

Friday, March 6, 2015

Back to Blogging!

 I'm back! Sorry for the long absence, I fell out of the habit of regularly blogging. I'll try to post some of my backlog. So happy to be back! These nails were inspired by a little notepad given to me by a friend, and were originally painted December 5th, 2014.
I started with a base of OPI Alpine Snow topped with Nicole by OPI Others Pale by Kim-parison to get a super light beige background. For my thumb and ring finger, I used a base of Color Club Lavandarling.

The damask-ish design was painted with a mix of Morgan Taylor Varsity Jacket Blues for the lovely bright blue and SpaRitual Shoot for the Stars for the dark purple. Gold accents were added with Sally Hansen Liquid Gold.
On my accent nails, the butterfly was painted in more Varsity Jacket Blues and outlined in more Liquid Gold. The leaves were done with OPI Here Today, Aragon Tomorrow and flowers in OPI Alpine Snow. I added a little accent gem to the center of the butterfly to match the notepad.
Colors Used:
OPI Alpine Snow
Nicole by OPI Others Pale by Kim-parison
Color Club Lavandarling
Morgan Taylor Varsity Jacket Blues
SpaRitual Shoot for the Stars
Sally Hansen Liquid Gold
OPI Here Today, Aragon Tomorrow

Wednesday, November 20, 2013

Classy Stripes

I was in the mood to play with some striping tape and linear designs. After doing a full rainbow of nail colors, it was time to have fun with some white and gray!
 I sometimes get so excited about painting intricate pictures that I forget how pretty simple designs can look. I started out on my left hand with a single coat of China Glaze White on White, then added Sinful Colors Silver Belle. I wasn't sure how opaque Silver Belle would be. However, I skipped the white on my right hand and just layered up three coats of Silver Belle alone. I actually prefer it without the white underneath, but both are pretty!
 I then added three pieces of striping tape to each finger, then painted the top half of each nail with SpaRitual Basalt, a lovely dark gray. It only took two coats to get to a nice, bold look. I really like the effect of the glitter peeking out between the gray lines.
Colors Used:
China Glaze White on White
Sinful Colors Silver Belle
SpaRitual Basalt

Tuesday, November 19, 2013

Playing with Red

In preparation for my move, I cut my nails back. Even still, I had some corners break. Sounded like a good reason to try a more oval shape! I took a week long break from serious nail arting, so this marked my return to doing more than a solid coat of one polish!
 To begin, I used one coat of Sinful Colors Gogo Girl, which is a nice bright red. I then added one coat of Icing Love Letters, a seriously amazing red jelly with gold microglitter. I then added Wet n Wild Black Lace Creme across my tips.I refined the edges with Sinful Colors Nail Art Bad Chick (white), and Salon Perfect Silver Sparkle. I only did the Silver Sparkle on my left hand, as I couldn't decide if I liked it better with or without. 
 Over the black tips I added Hard Candy Pop Rocker. I am such a sucker for matte glitter, it is amazing. The end results looked a little Christmasy perhaps, but I still enjoyed it!
 Colors Used:
Sinful Colors Gogo Girl
Icing Love Letters
Wet n Wild Black Lace Creme
 Sinful Colors Nail Art Bad Chick 
 Salon Perfect Silver Sparkle
Hard Candy Pop Rocker


Swirls of Caramel


 These were the last nails I did before my move! I was in the mood for a water marble. I didn't focus on getting matching arcs or patterns on each nail; rather, I just had fun trying to select interesting sections of the marble and seeing how they turned out.
 The base color was Nicole by OPI Kim Konfidential. For the marbling, I used Kim Konfidential, SpaRitual Copper, and SpaRitual Running With Wolves. I love this trio together!


 You can see as I moved from right to left hand, my water had cooled a bit (it was a chilly night), and the metallic polishes started to fragment as they spread. I rather liked the result, so I just went with it! It reminds me of picture jasper polished stones.

As a last touch, I used Sally Hansen Debutint on my right hand, to add a little more gold shimmer.
Colors Used:
Nicole by OPI Kim Konfidential
SpaRitual Copper
 SpaRitual Running With Wolves
 Sally Hansen Debutint

Monday, November 4, 2013

Glitter Falls

 Almost caught up! I decided to go super sparkly for a bit, because glitter is awesome yet I never use it enough. I'll have to make more of an effort to grab glitter from now on! Rather than exploiting tons of glitter polish, I decided to play with loose glitter for these nails. I also toyed around with a variation of 'waterfall' nails, trying to do creme falls over glitter. I think it looks funky and fun!
I started with a base of OPI Metallic 4 Life, which is black polish jam packed with different sized silver glitter. Next, I grabbed loose craft glitter in bright green, and using a slightly damp watercolor brush I applied it to the bottom half of each nail. After cleaning the brush off, I repeated that step with bright orange glitter. I was so tempted to leave it at just that!

 For the waterfall effect, I used a small tapered brush, Wet n Wild Black Lace Creme, and Sinful Colors Snow Me White. The final effect dims the gold a bit, but it's rather neat to see it peeking out between the stripes.

 Colors Used:
OPI Metallic 4 Life
Craft store loose glitter (green and orange)
Wet n Wild Black Lace Creme
Sinful Colors Snow Me White


Related Posts Plugin for WordPress, Blogger...